


27 Nov 2023 How to Setup Multi Store in Magento 2
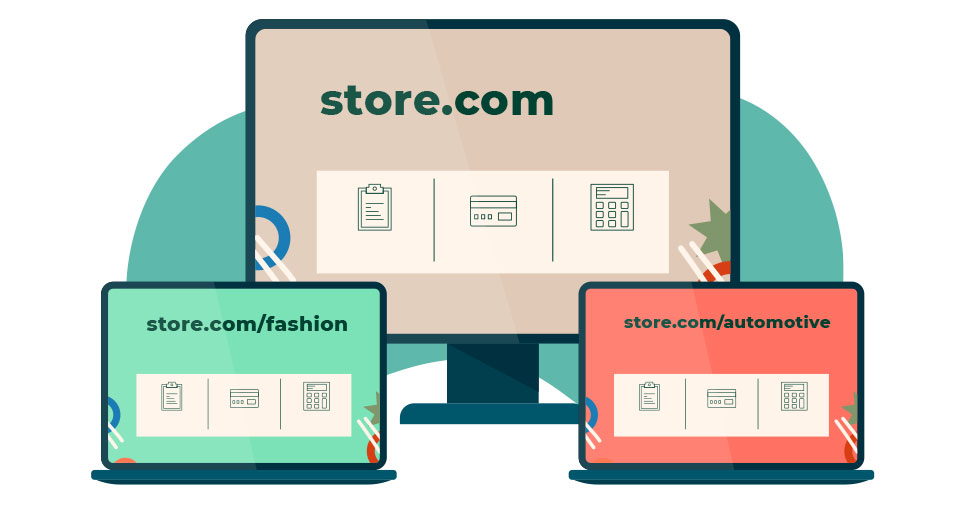
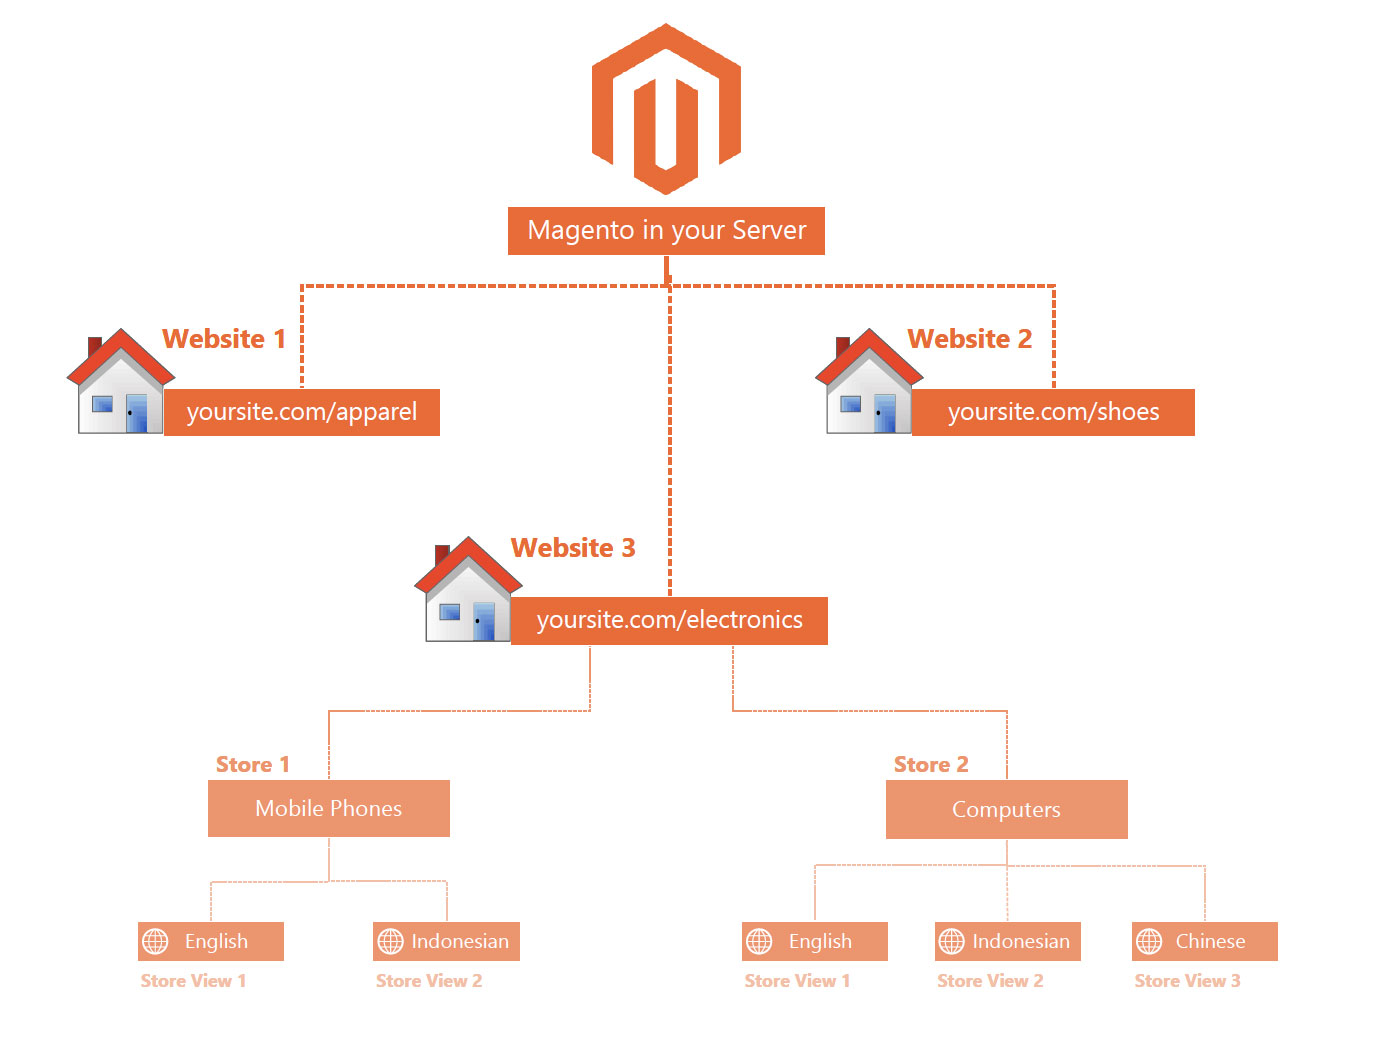
Main Benefits of Multiple Store in Magento 2
You can leverage some benefits of creating multiple store setup like…
1. Setup different customer group for each store.
2. Set different display prices as per need.
3. Category settings can be different but you can use same root category for all store views.
4. Setup a different theme for each store.
5. Set different language, currency, payment, and shipping options and apply tax classes to each store.
Step 1: Create Root Categories
Creating a root category is optional, but you can assign and create additional categories if you choose.
Log in to your Magento 2 admin backend.
To create a root category, folllow the steps below:
1: Navigate to the Catalog > Categories
2: Click Add Root Category
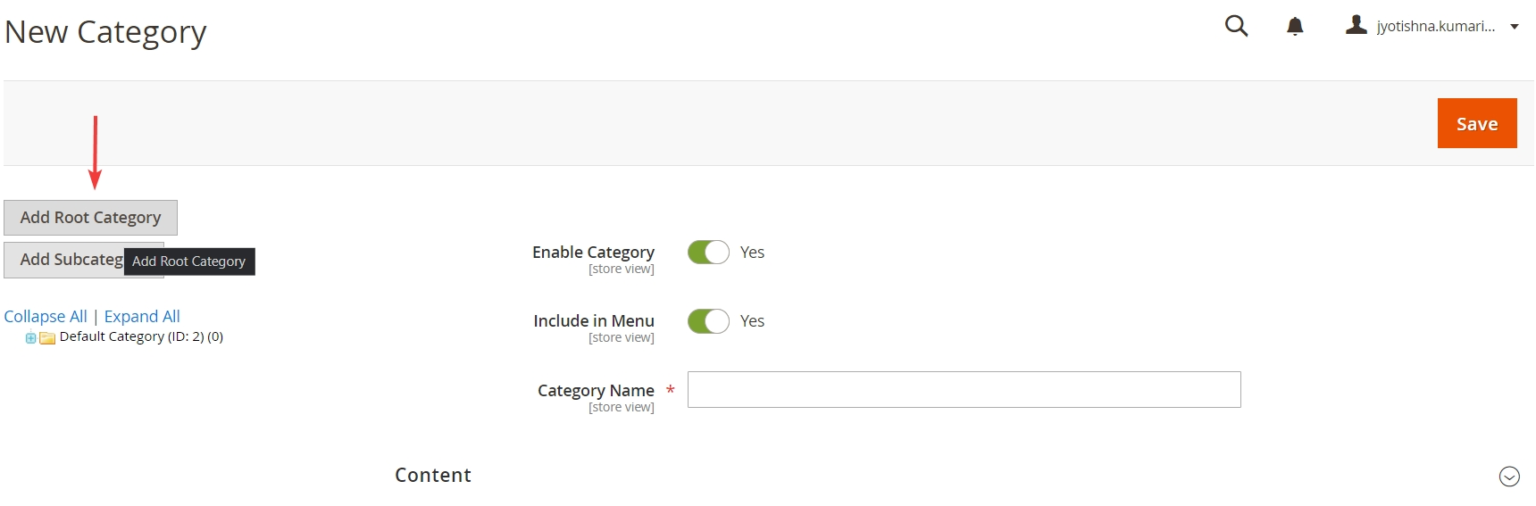
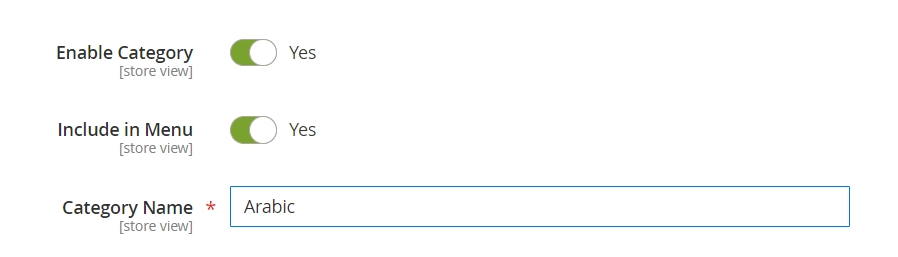
3: In the Category Name field, enter a unique name to identify this category.
4: Make sure that Enable Category is set to Yes.
5: Click Save.
6: Repeat these steps if you want to create more root categories for your stores.
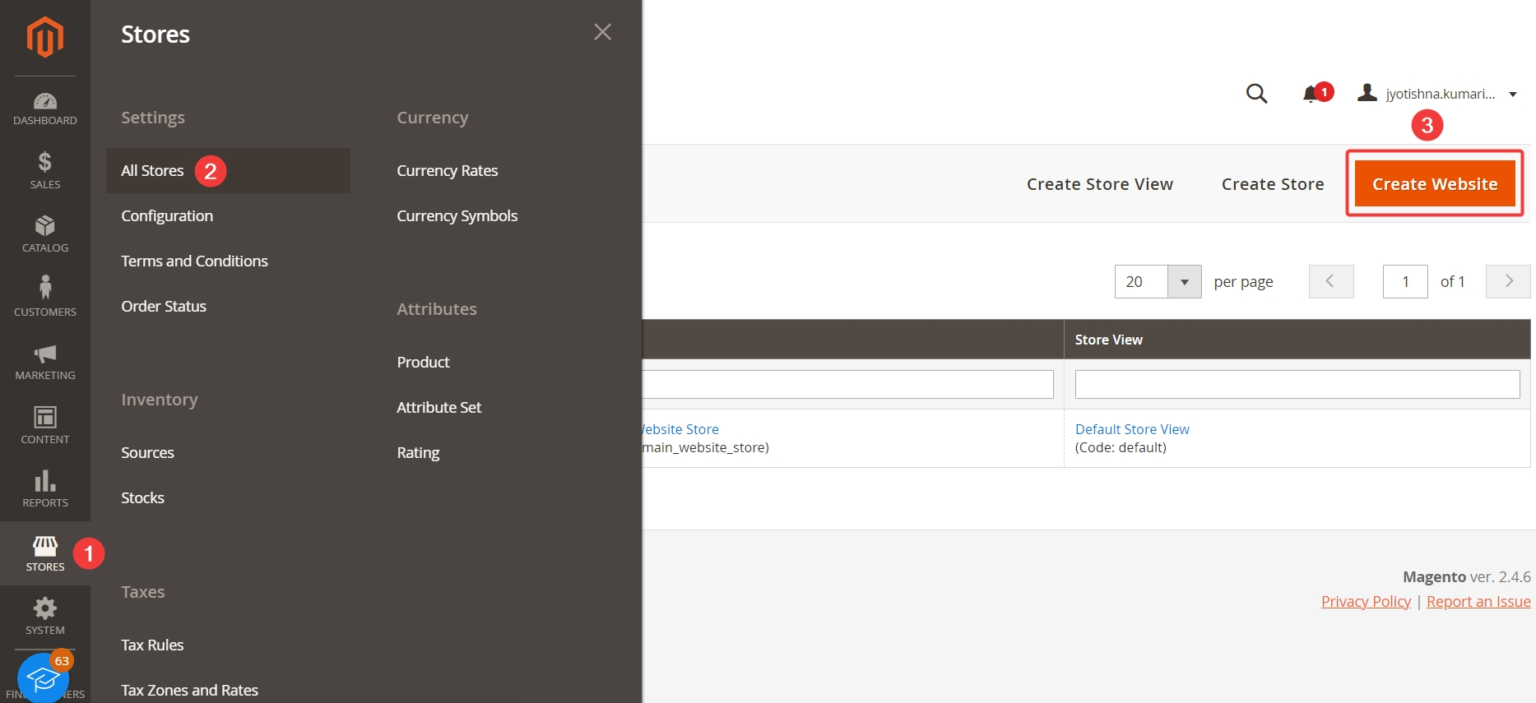
Step 2: Create New Website
1: Navigate to the Store > Settings > All Stores.
2: Click on Create Website and configure the following fields:
- Name: Insert a name for your new website.
- Code: This code needs to be unique.
- Sort Order (Optional): Insert the sort order for your website. Remember, the default is ‘0
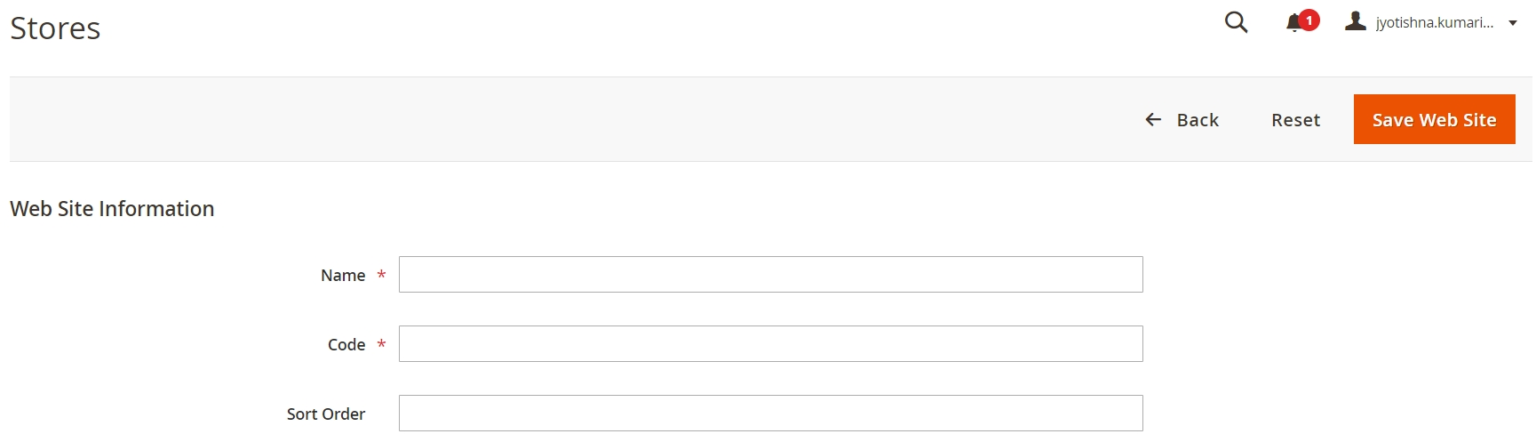
3: Click Save Web Site.
4: Repeat these steps to create as many websites as you like.
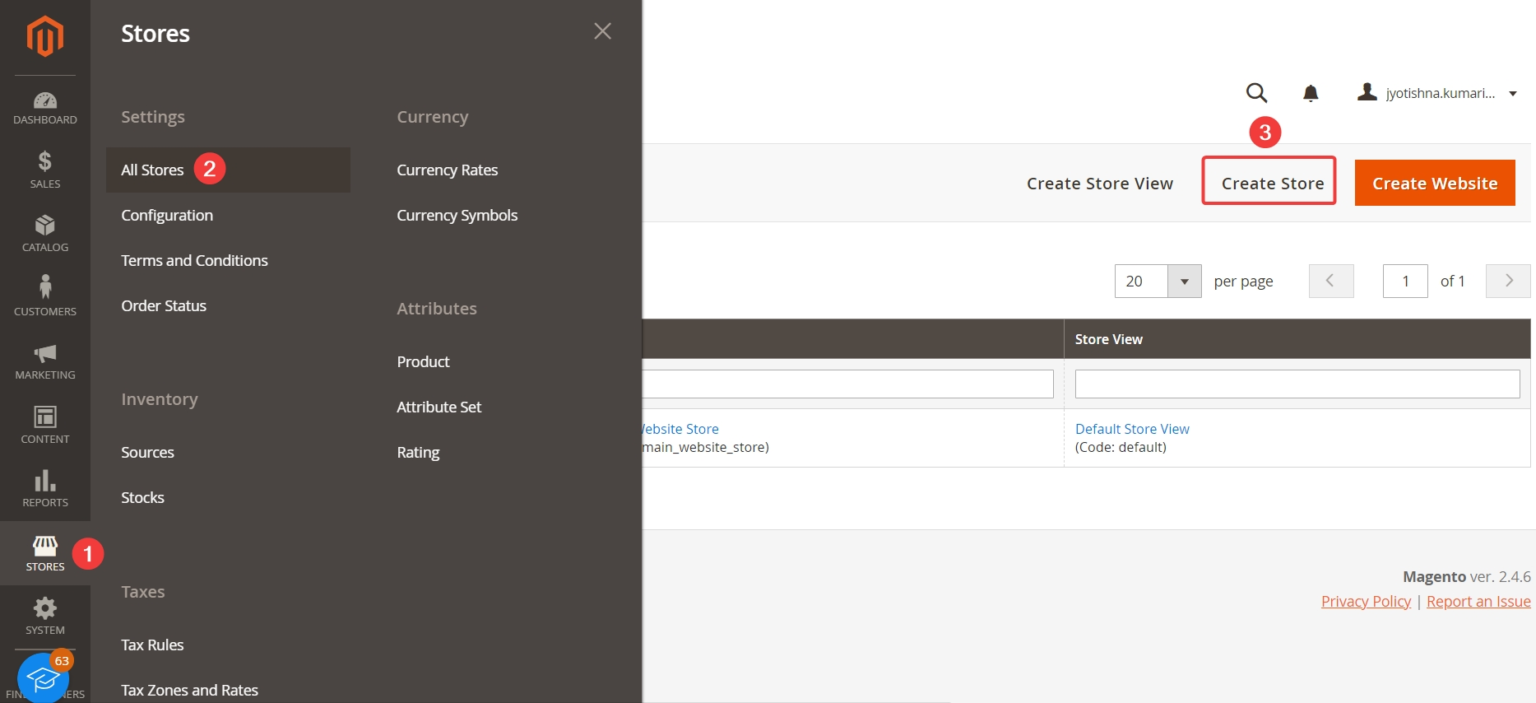
Step 3: Create Stores
After the sites are ready, it’s time to build your stores.
To create stores, follow these steps:
1: Navigate to Stores > Settings > All Stores.
2: Click on Create Store, then follow the below fields:
- Web Site: Select the website name with which to associate this store.
- Name: Enter a name to identify the store.
- Code: Enter a unique code to identify the store.
- Root Category: Click the name of the root category for this store.
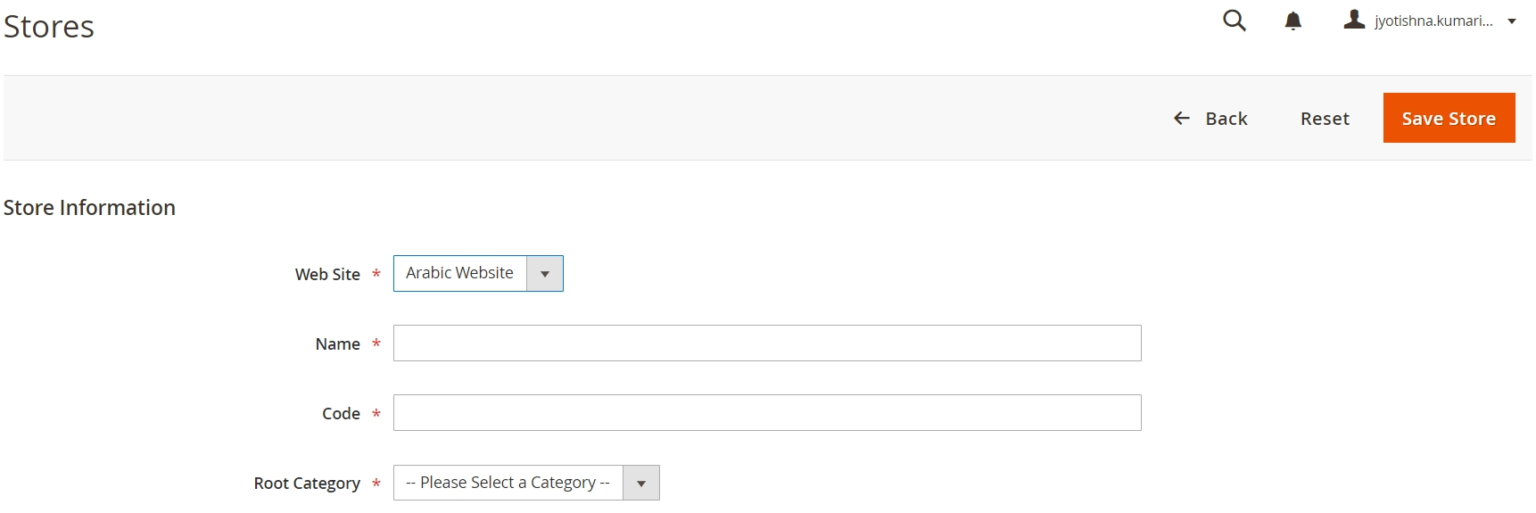
3: Click Save Store.
4: Repeat these steps to create as many stores as you like.
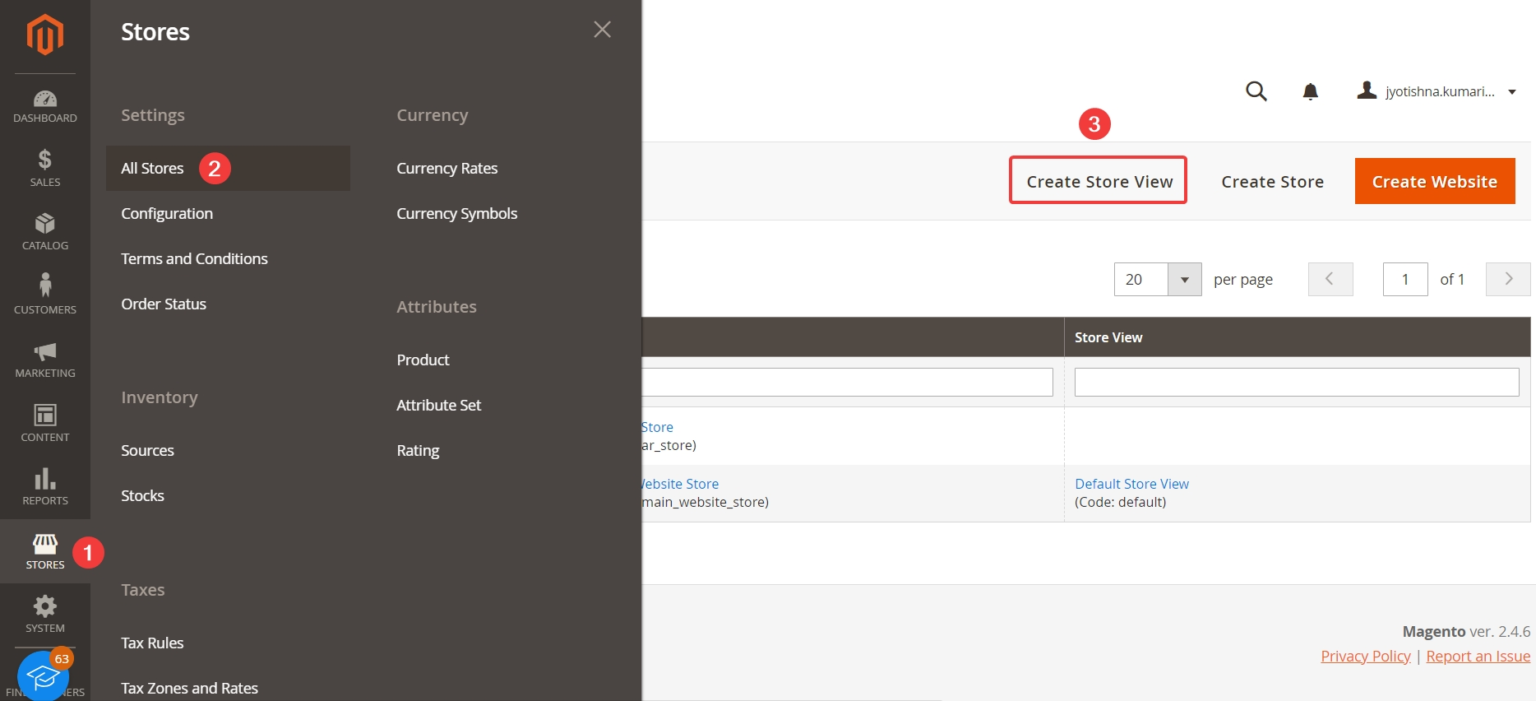
Step 4: Create Store Views
This is where you create store views.
To create a store view, follow the below steps:
1: Navigate to Stores > Settings > All Stores.
2: Click Create Store View and fill in the details:
- Store: Select the store name with which to associate this store view.
- Name: Enter a name to identify this store view.
- Code: Enter a unique name to identify this store view.
- Status: Select Enabled.
- Sort Order (optional): Set the position of the new store in the list.
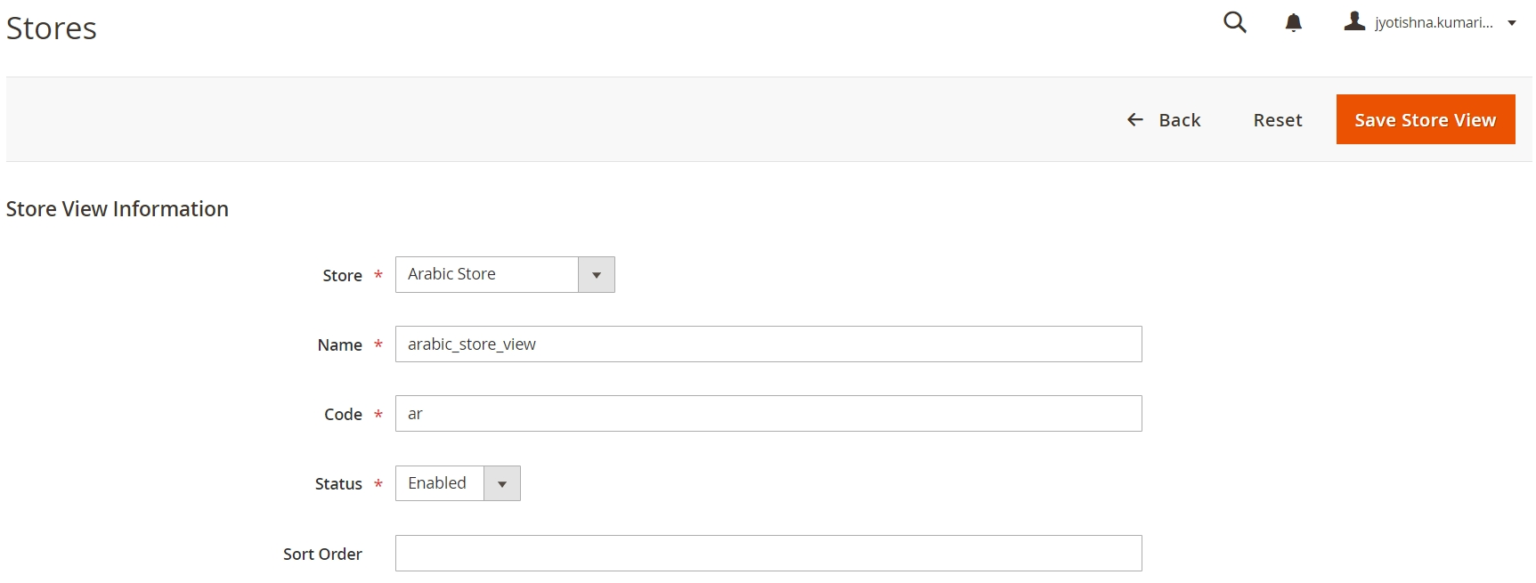
3. Click Save Store View.
4. Repeat these steps to create as many store views as you like.
Step 5: Change the Website Base URL
In this step, you’ll need to change the base URL for each website in the Admin to access them using unique URLs.
Follow the below steps to configure the website URL:
1: Navigate to Stores > Settings > Configuration > General > Web.
2: From the upper left corner, select the Store View list at the top of the page, and click the name of one of your websites.
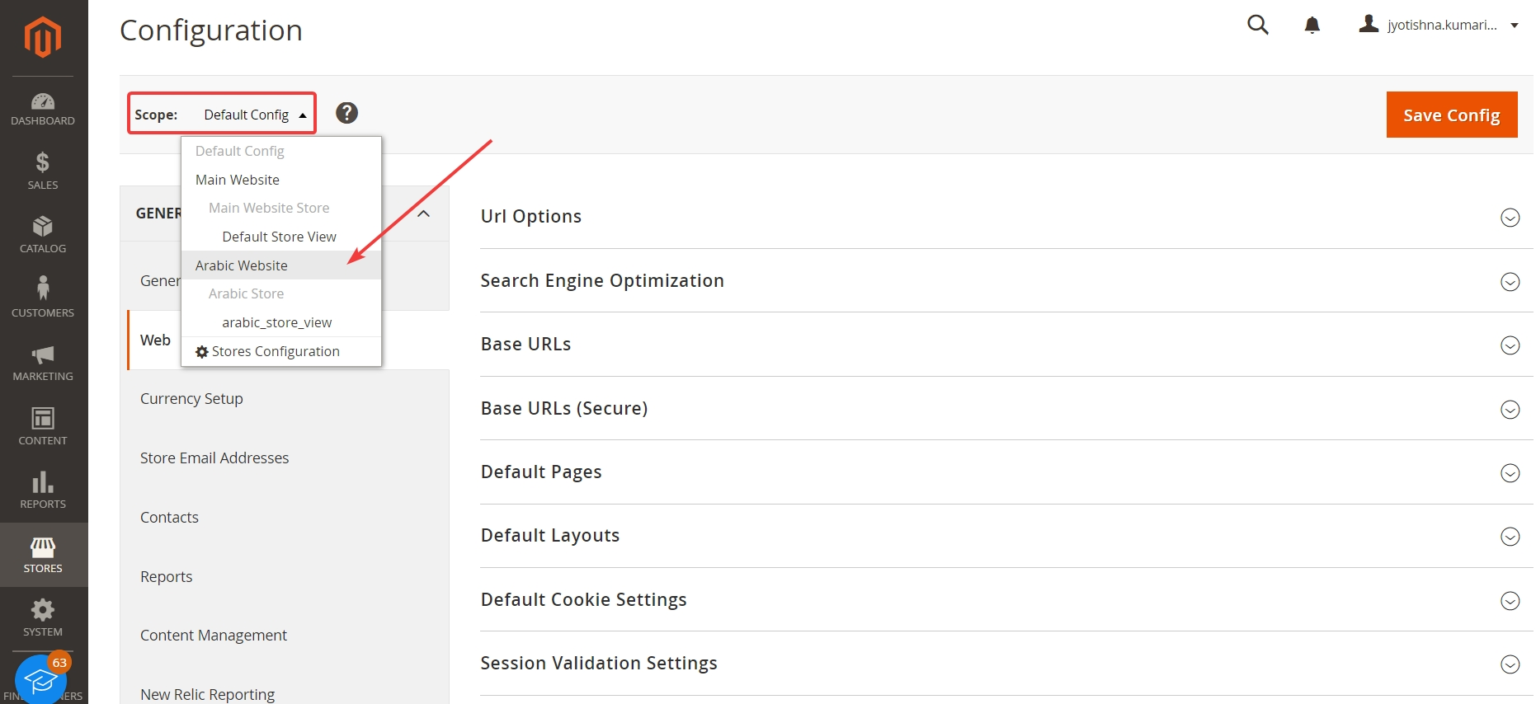
3: Expand Base URLs. In the Base URLs section, clear Use Default.
4: Enter the domain/subdomain, for example“https://fashion.yourstore.com” URL if you have any in the Base URL and Base Link URL fields.
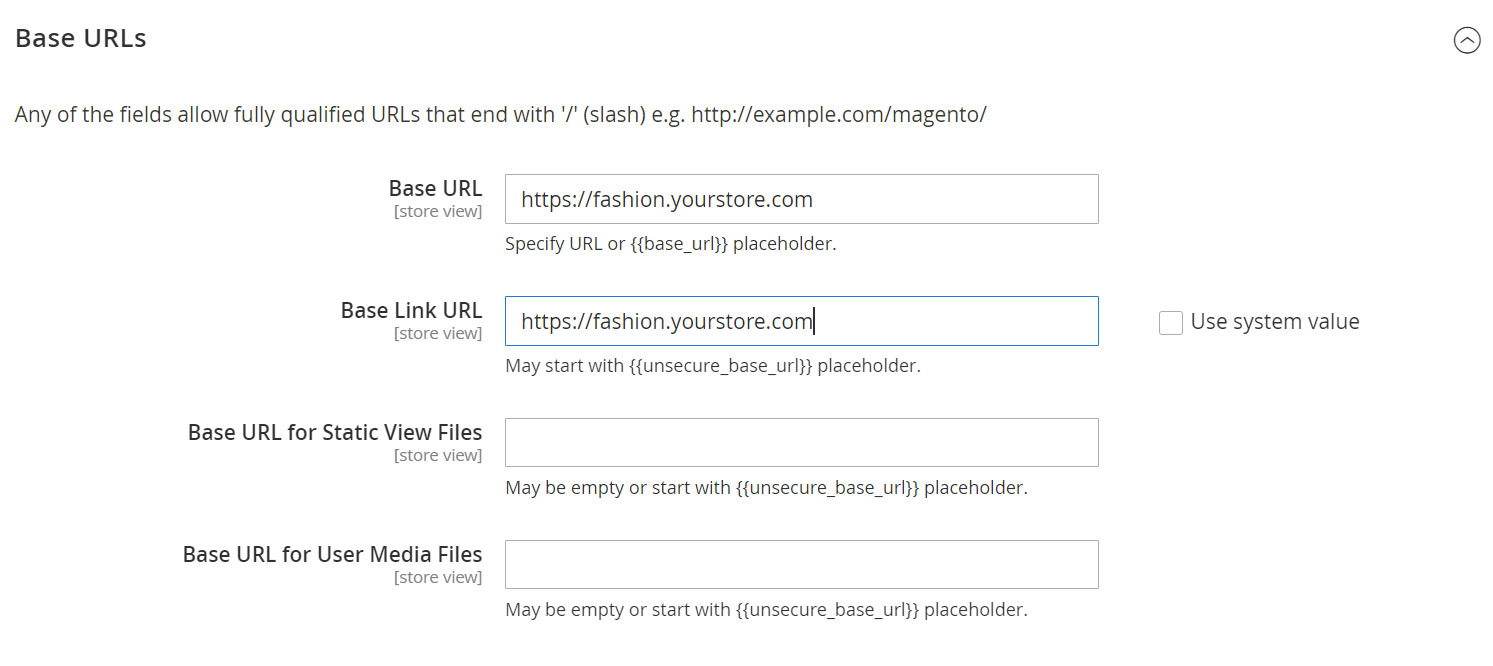
5: Repeat the previous step in the Base URLs (Secure) section.
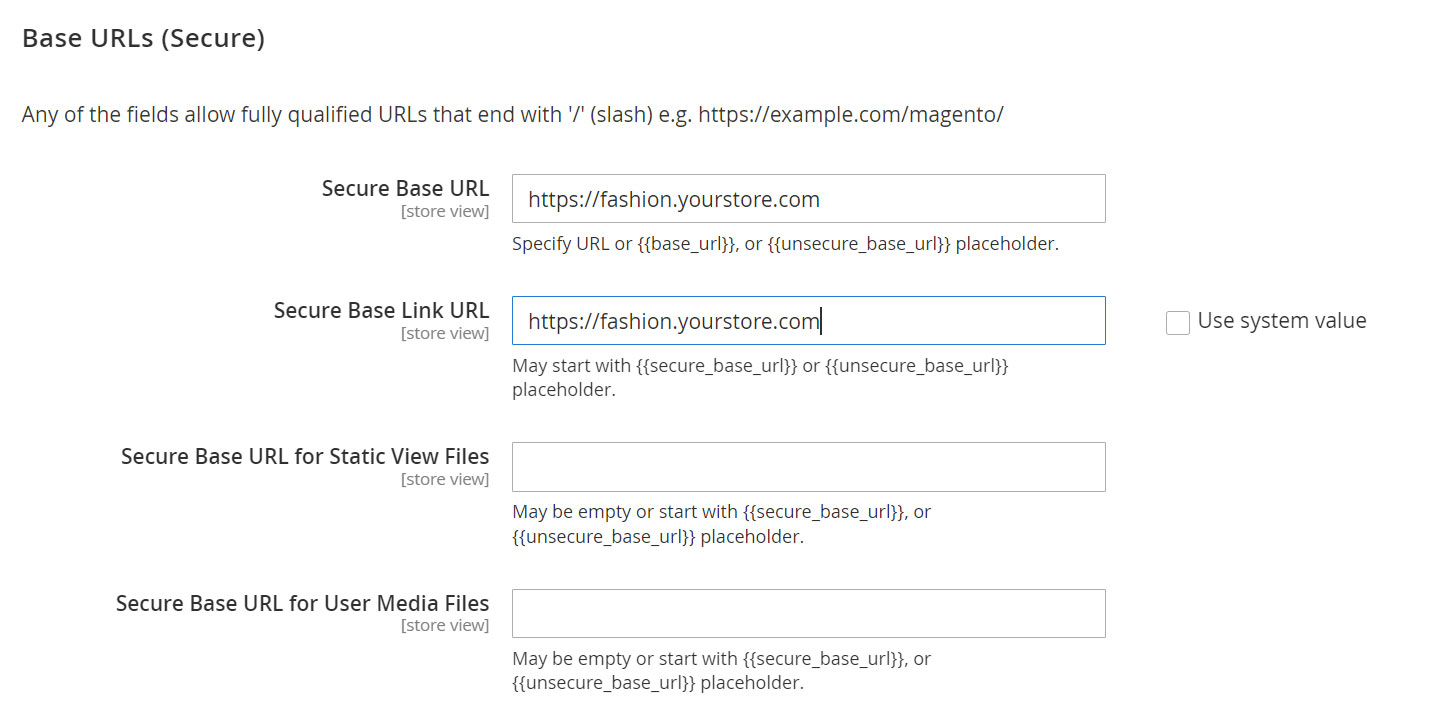
6: Click Save Config.
7: Repeat these steps for each multiple websites.
Step 6: Add the Store Code to the Base URL
Adding the store codes can prevent you from creating separate directories for each store and simplifies the process.
To add the store code to the base URL, follow the below steps:
1: Navigate to Stores > Settings > Configuration > General > Web.
2: From the Store View list at the top of the page, click Default Config as shown below:
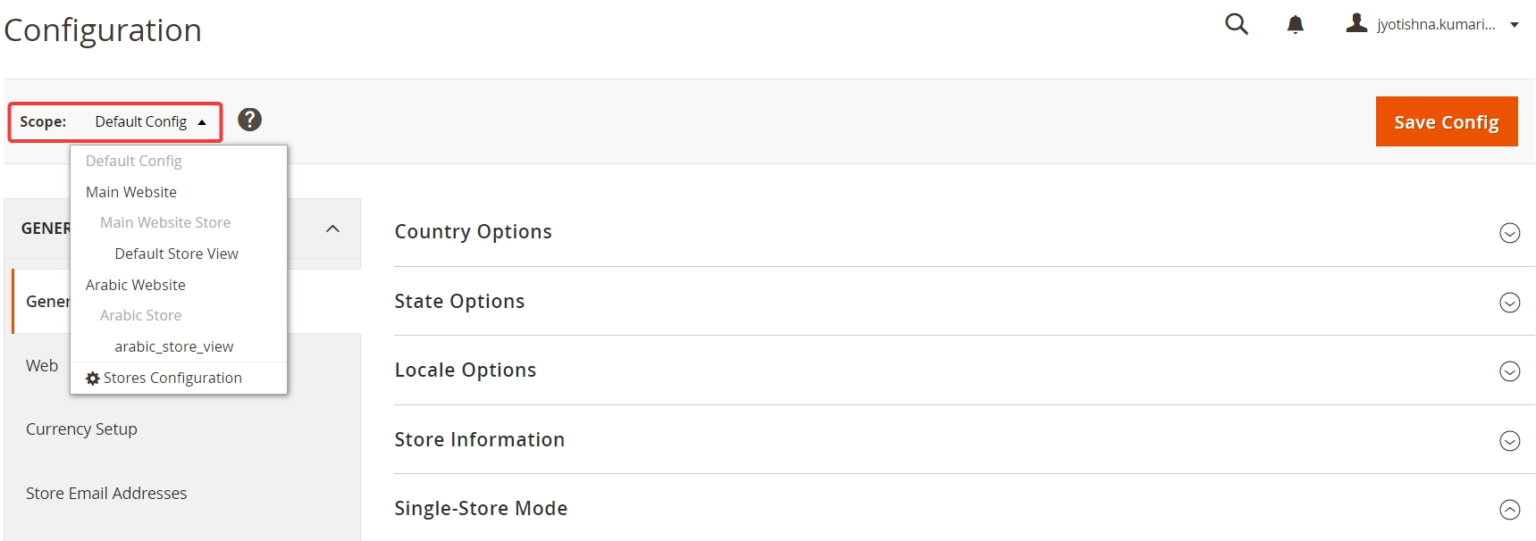
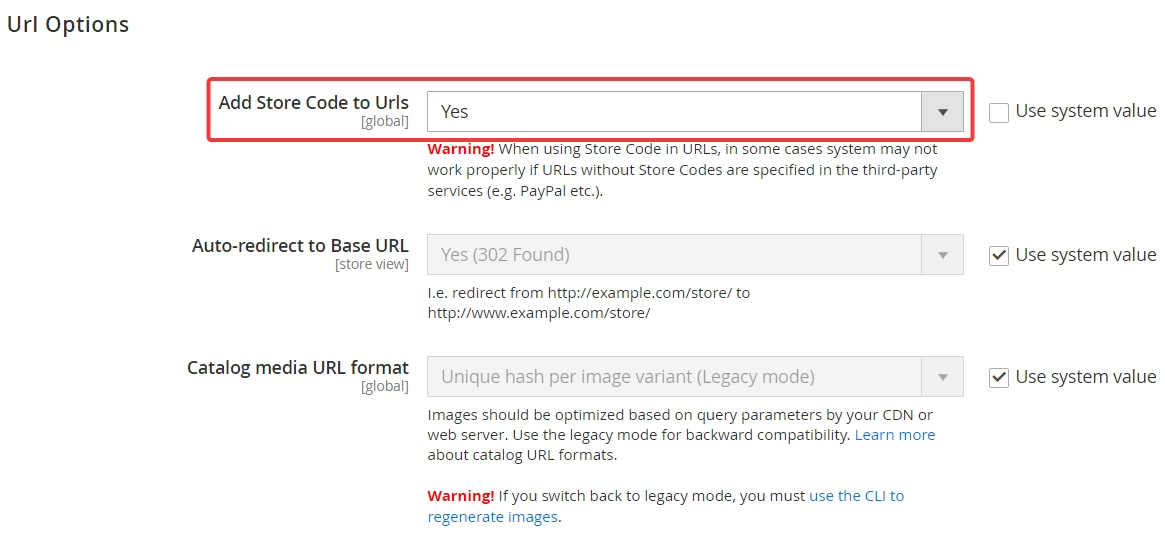
3: Expand URL Options and clear the Use system value checkbox next to Add Store Code to URLs.
4: From the Add Store Code to URLs list, click Yes.
5: Click Save Config.
6: If prompted, flush the cache. (System > Cache Management).
Step 7: Change the Default Store View Base URL
This is important. Improper execution here may result in you losing access to the Admin.
To change the default store view base URL, follow the below steps:
1: Navigate to Stores > Settings > Configuration > General > Web.
2: From the Store View list at the top of the page, click Default Config.
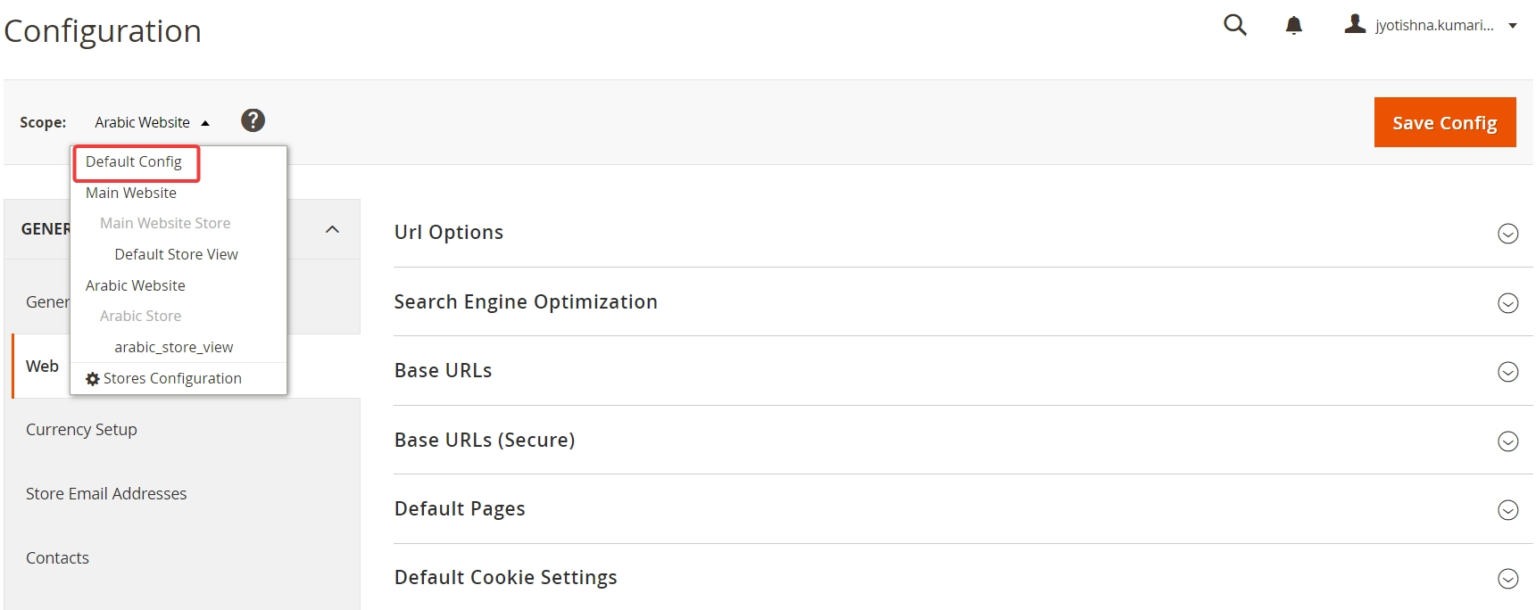
3: Expand Base URLs section. In the Base URLs section, clear Use system value.
4: Enter the Main/Base URL, for example: “https://yourstore.com” in the Base URL and Base Link URL fields.
5: Repeat the previous step in the Base URLs (Secure) section.
6: Click Save Config.
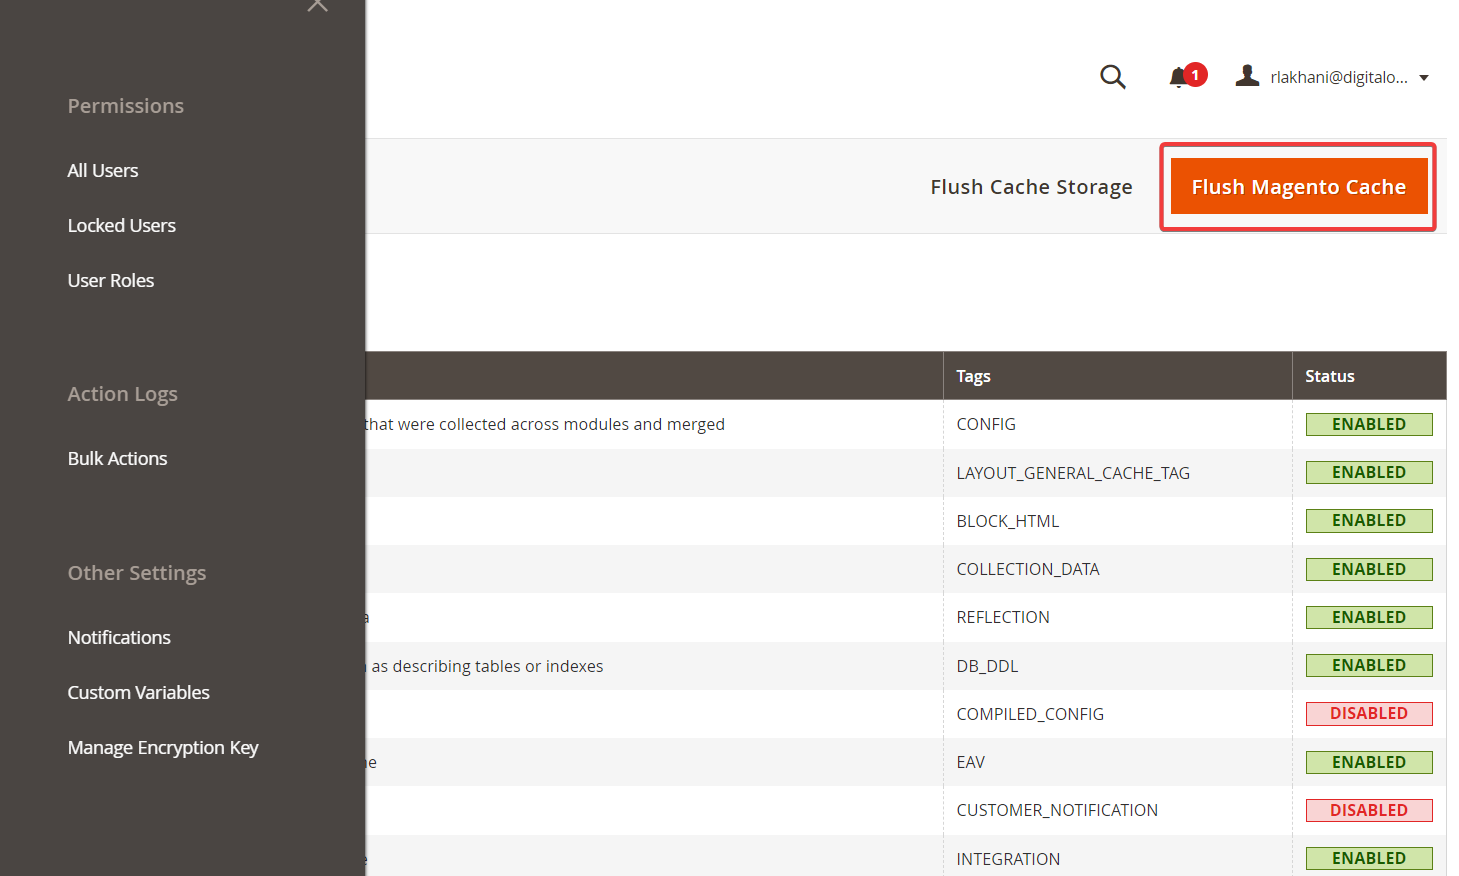
Step 8: Flush Magento Cache
The final step is to flush the cache. The process is super simple. Navigate to Systems > Cache Management.
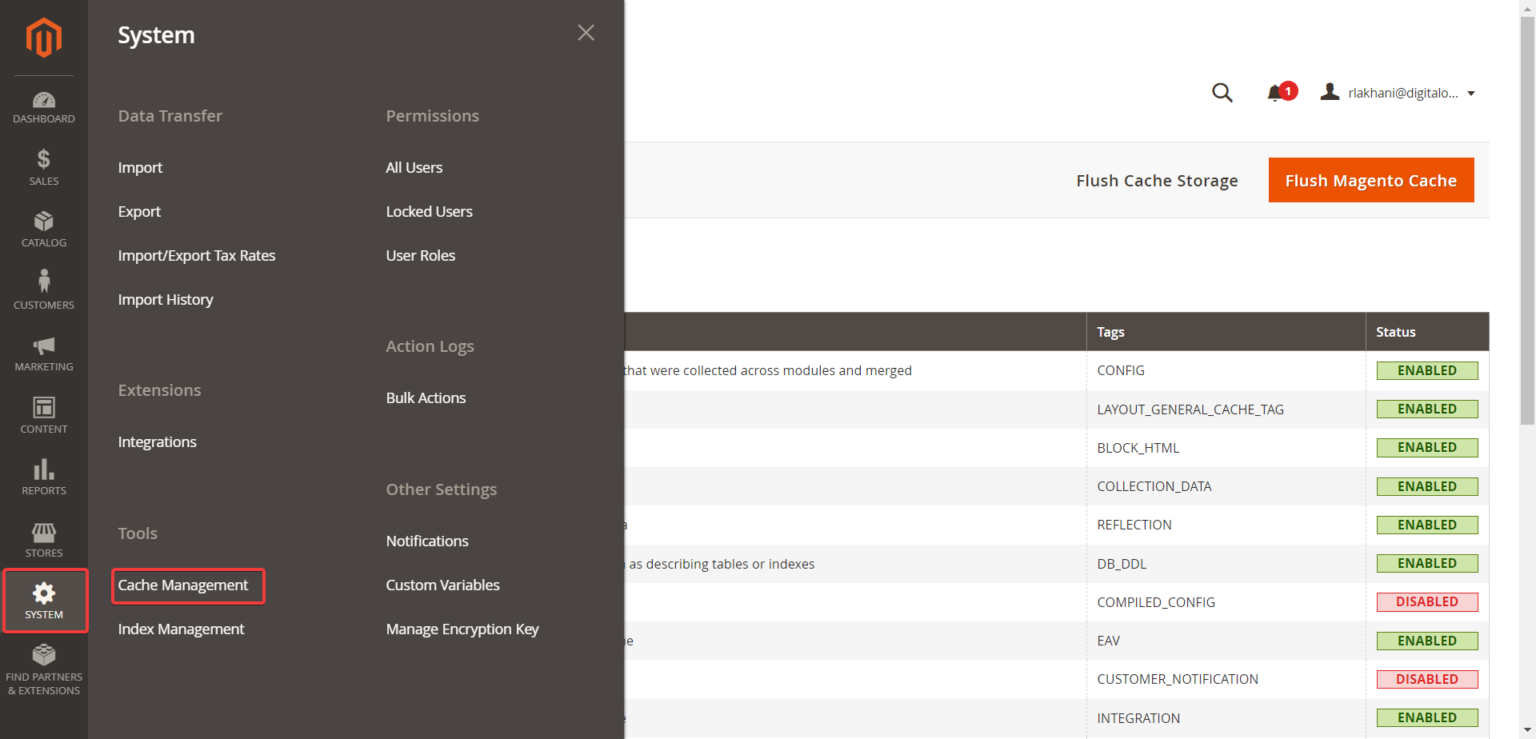
Once done, click the “Flush Magento Cache” button and wait until the process is complete.
That’s all. You are done.